So that's what I'm going to do today. Another day, I'll give the mashed potato recipe. I always post recipes with step-by-step pictures, so.. if that's annoying let me know and I won't do it next time. This time, just deal with it. ;-)
HOW TO ROAST GARLIC
(which, p.s., can be put in/on pretty much anything. or eaten plain. it's friggin' delicious. I'd buy roasted garlic candy, I really would)
1. First step is to get a few bulbs of garlic. I usually do about five, since I can find a million things to do with roasted garlic. Make sure you get big, sturdy bulbs. What we don't want is a head that will break into a million teeny, tiny pieces instead of a few big, beautiful cloves.
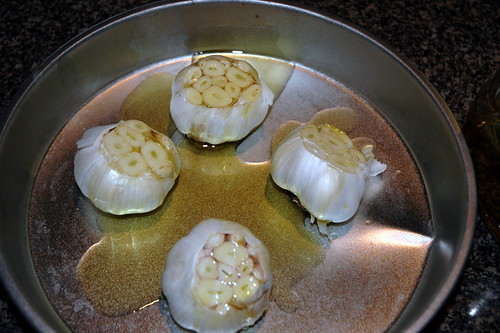
Cut off the top of the bulb, so that the little garlic clove's heads are exposed.

2. Put the bulbs in a pie tin or a cake pan, open side up. While you do this, pretend that my pictures are taken in nice light and with better post-processing. It will make me feel better.

They look freakishly like little pod animals. I can't look at it too long or it weirds me out. And kind of makes me feel sick, despite how much I love garlic. Eesh. Okay. Next step.
3. Drizzle Extra Virgin Olive Oil liberally over the top, ensuring that you cover all exposed cloves. Like drowning all the little pod bodies so they won't take over the earth.

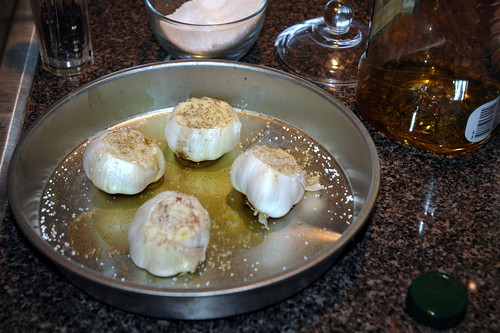
4. Salt and pepper the cloves. I like to live by the rule that you can never have too much salt. I know what you're thinking: It is OBVIOUS that I am the prime example for healthy living. =/ With that in mind, use your own judgment. But remember: Salt Tastes Good.

Note that I'm using Kosher Salt, here. It's not necessary, but I find it much better for most cooking purposes. It's called Kosher salt because it is used in making meats Kosher. Because of its flat surface, it sticks more easily and brings the blood out. It should also be noted that you typically need nearly twice as much kosher salt to equal the same amount of saltiness that you'd get from table salt.
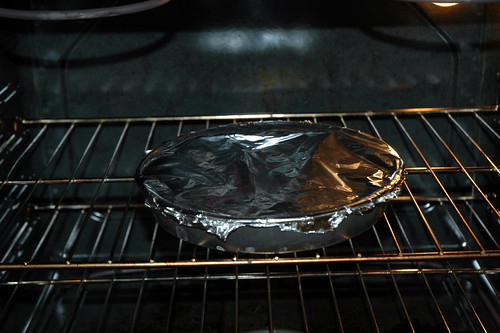
5. Cover the pan with tinfoil, and place it in a 375 degree oven for about 35-45 minutes.

Pretend like you don't see the grease on the back of my oven. I really loathe cleaning ovens.
6. When the time is up, pull them out. They will look beautiful and ravishing. Like this.

7. Important: WAIT UNTIL THEY COOL DOWN. You'd think this would be common sense, but I don't want any lawsuits on my hands, here. Give them 20 minutes. Then proceed.
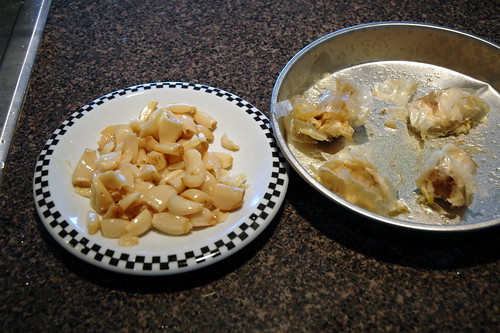
Squeeze the cloves out of the bulbs. They will just POP out. Kind of like birthing a baby. A little garlic baby. Only without the blinding pain, and hours of pushing. And also, no uterus.


8. Et Voila! You now have a beautiful plate full of soft, incredibly flavorful garlic cloves that you can do pretty much anything with.

You can throw the garlic peely stuff (does it have a name??) away. Unless you are attached to it, and want to bury it in your backyard under a tree like some people do with their placentas.
I think I just took the birthing analogy a little too far. Moving on.

Put them on baked potatoes. Put them in salads, pastas, meatloafs. Stick them in marinades, stuff them into chicken breasts. Keep them in a bag in your purse and munch on them all day long. Not only are they delicious, but they will also raise your immunity. Also ward off vampires.
Just be sure to carry some breathmints. Not everyone shares my adoration for the smell of garlic.

You're too funny, Amy. But a great garlic chef...
ReplyDelete